Restore an automatic backup
Note: this information is intended for experienced users. If you do not feel comfortable with these explanations, please contact our Technical Support department for assistance. The security of your data depends on it.
The Office Maker and BiblioMaker software packages feature automatic data backup, both in single-user and client-server versions.
Two complementary backup strategies are used:
- In the single-user version, a full backup of the data file is made every time you quit the program or open another database. In addition, a log file records in real time all modifications made to the database since the last full backup.
- In the server version, a full backup of the database is performed at regular intervals (usually once a day). In addition, a log file records in real time all modifications made to the data file since the last full backup.
With these two strategies, you can restore the last full backup and optionally integrate the log file to retrieve the state of your database up to the minute before an incident. Another option offered by the log file is to partially integrate it in order to retrieve the state of the database at a given moment (for example, prior to a false manipulation which led to the accidental deletion of a certain number of records).
A backup is restored as follows:
Single-user version: restore a full backup
Start the software and press the Shift key during startup. A window for choosing a favorite file appears.
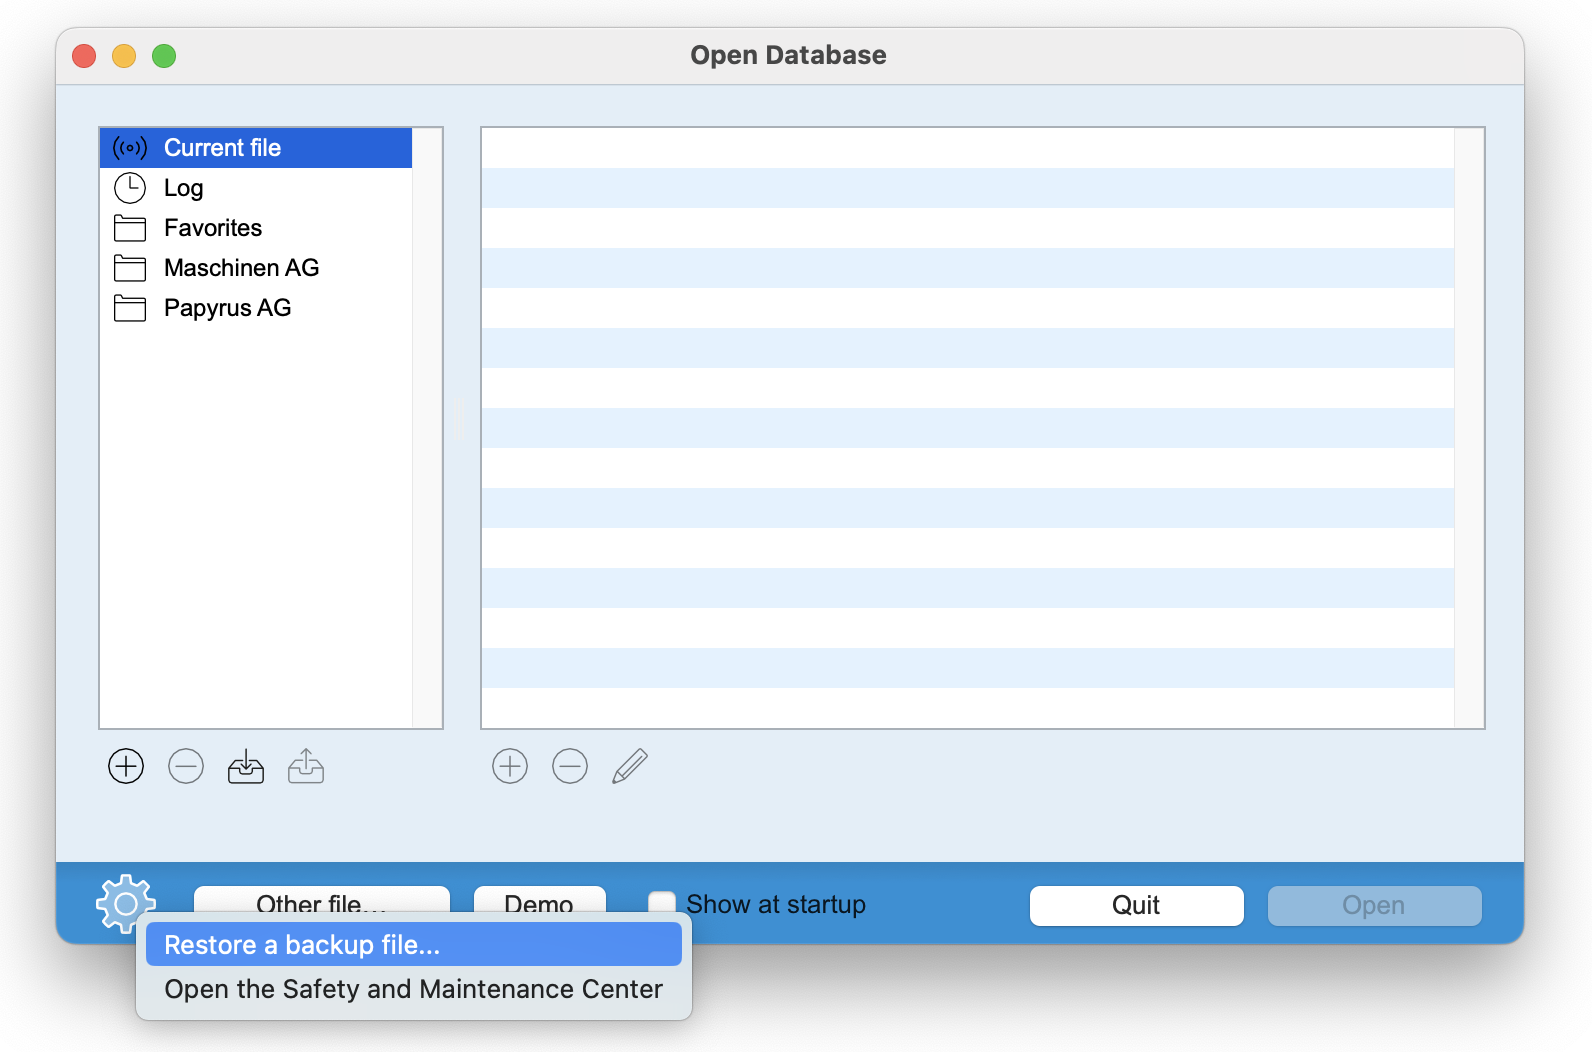
Select the Restore a backup file command from the "Gearwheel" button. The following dialog is displayed:

This dialog contains two fields: the name and location of the backup file to be restored*, and the desired location for the restored file. Click on the icon to the right of each field to fill them in.
*The backup file to be restored has the .4BK extension. The number in square brackets and the file creation date help you determine which backup to restore.
Once you've completed all the fields, confirm the dialog. Restoration takes just a few seconds (depending on the size of the database). The restored file has the .4DD extension, which is the usual extension for an Office Maker or BiblioMaker file.
Quit the program.
If necessary, place the restored file in the same folder as the original database. Rename the original file, e.g. by adding the word "original" (e.g. rename "OMF_Edelweiss_2023.4DD" to "OMF_Edelweiss_original_2023.4DD") and, if necessary, rename the restored file to match the original (e.g. OMF_Edelweiss_2023.4DD).
Restart the program by pressing the Shift key and, in the Favorites dialog, select the restored file.
Once the file is open, check that it contains the desired data and, if everything is in order, continue working with it. You can then delete the original database.
Single-user version: restore of a full backup and integrate the log file
Start the software and press the Shift key during startup. A window for choosing a favorite file appears.
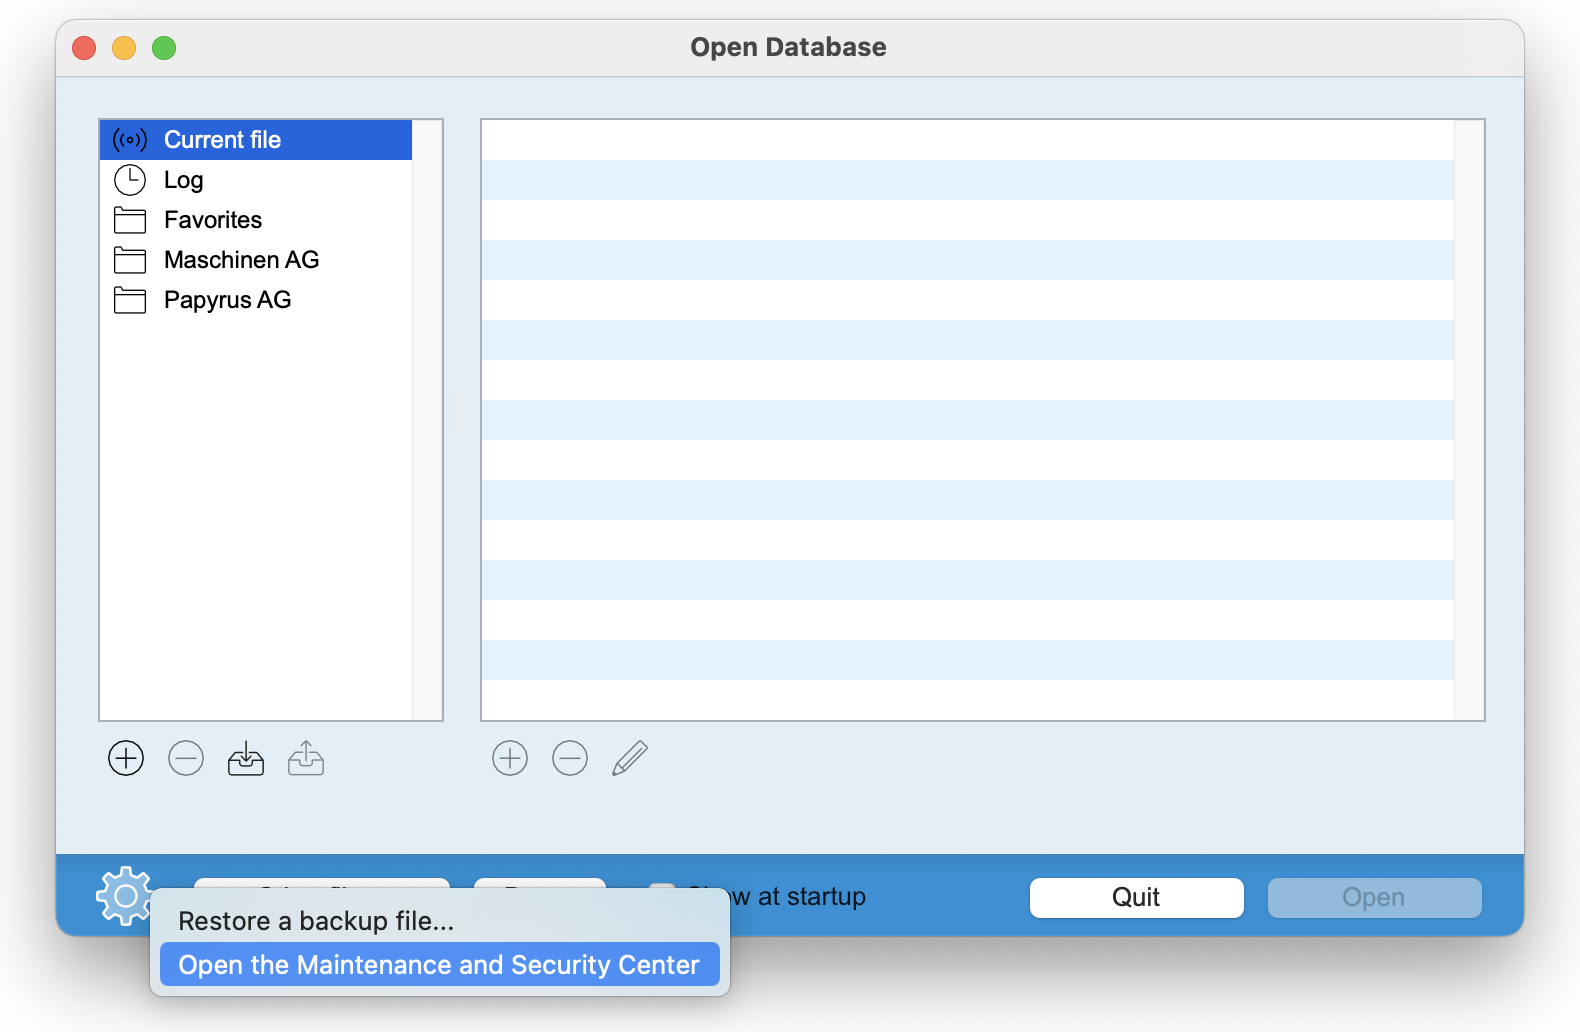
Select the Open Maintenance and Security Center command from the "Cogwheel" button. The Security Center is displayed. Click on the Restore tab in the left-hand sidebar.
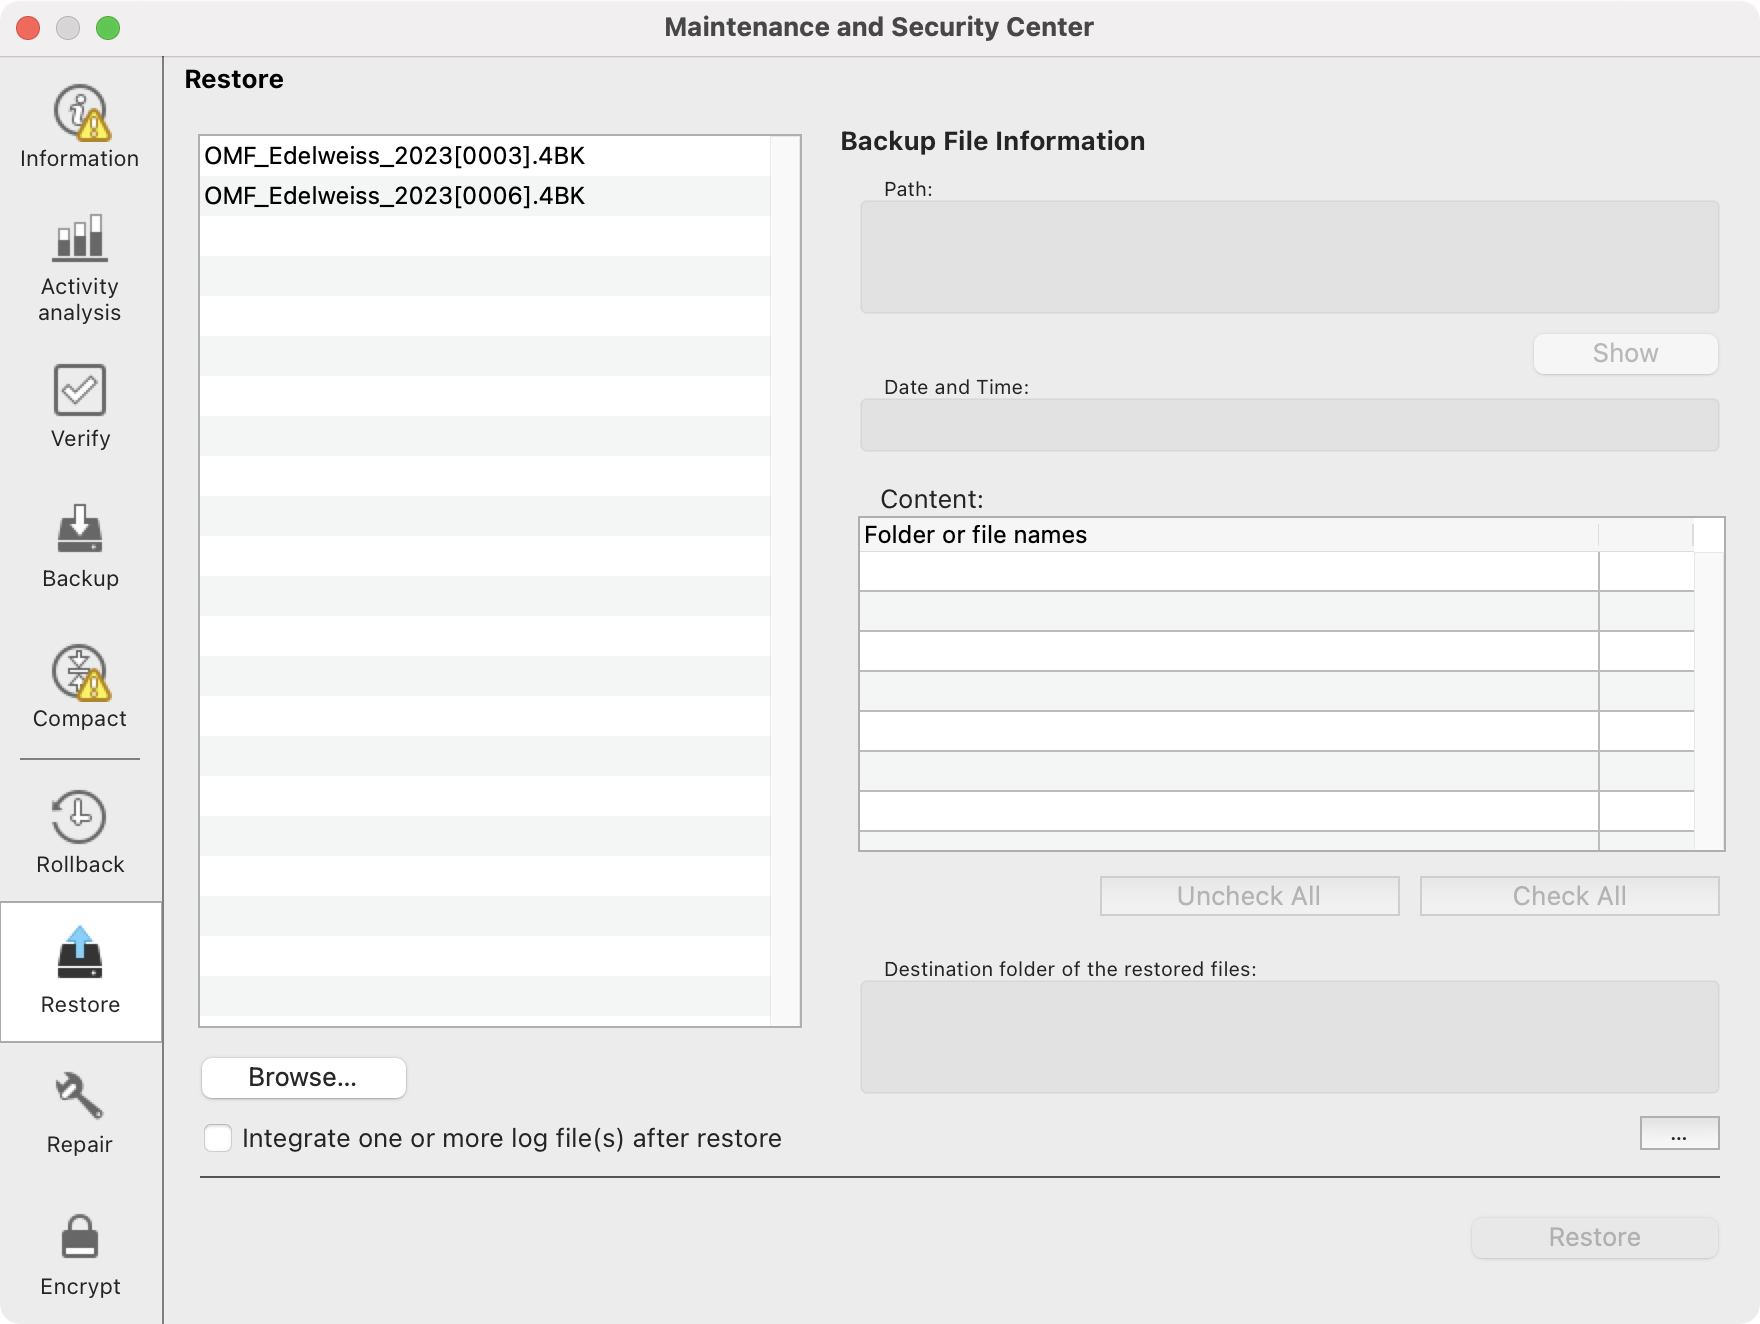
The main area of the dialog lists the various backups found on the disk. If you click on a backup, various information is displayed on the right: location, date and contents of the backup file. In the bottom right-hand corner, the proposed location for restoring the backup. Click on the … button to change location.
The Browse… button lets you search for other backups on disk.
Check the box Integrate one or more log file(s) after restore, to complete your full backup with any modifications made subsequently.
Quit the program.
If necessary, place the restored file in the same folder as the original database. Rename the original file, e.g. by adding the word "original" (e.g. rename "OMF_Edelweiss_2023.4DD" to "OMF_Edelweiss_original_2023.4DD") and, if necessary, rename the restored file to match the original (e.g. OMF_Edelweiss_2023.4DD).
Restart the program by pressing the Shift key and, in the Favorites dialog, select the restored file.
Once the file is open, check that it contains the desired data and, if everything is in order, continue working with it. You can then delete the original database.
Client-server version: restore a full backup
The database is restored on the server.
On Windows, if the server application is running as a service, stop the service.
Start the server application manually (via Finder or File Explorer) and press the Shift key during startup. A dialog window appears. Select the Restore a backup file option, fill in the two fields Backup file and Destination folder (use the icons to the right of the fields), then confirm. Restoration takes just a few seconds (depending on the size of the database). The restored file has the .4DD extension, which is the usual extension for an Office Maker or BiblioMaker file.
Quit the program.
If necessary, place the restored file in the same folder as the original database. Rename the original file, e.g. by adding the word "original" (e.g. rename "OMF_Edelweiss_2023.4DD" to "OMF_Edelweiss_original_2023.4DD") and, if necessary, rename the restored file to match the original (e.g. OMF_Edelweiss_2023.4DD).
Restart the program by pressing the Shift key and, in the Favorites dialog, select the restored file.
Once the file is open, check that it contains the desired data and, if everything is in order, continue working with it. You can then delete the original database.
Client-server version: restore a full backup and integrate the log file
The database is restored on the server.
On Windows, if the server application is running as a service, stop the service.
Start the server application manually (via Finder or File Explorer) and press the Shift key during startup. A dialog window appears. Select the Open Maintenance and Security Center option.
The main area of the dialog lists the various backups found on the disk. If you click on a backup, various information is displayed on the right: location, date and contents of the backup file. In the bottom right-hand corner, the proposed location for restoring the backup. Click on the … button to change location.
The Browse… button lets you search for other backups on disk.
Check the box Integrate one or more log file(s) after restore, to complete your full backup with any modifications made subsequently.
Quit the program.
If necessary, place the restored file in the same folder as the original database. Rename the original file, e.g. by adding the word "original" (e.g. rename "OMF_Edelweiss_2023.4DD" to "OMF_Edelweiss_original_2023.4DD") and, if necessary, rename the restored file to match the original (e.g. OMF_Edelweiss_2023.4DD).
Restart the program by pressing the Shift key and, in the Favorites dialog, select the restored file.
Once the file is open, check that it contains the desired data and, if everything is in order, continue working with it. You can then delete the original database.
 Français
 Deutsch
 Italiano