How do I create an entry ?
To record an accounting entry, select the Entries file in the Data menu and then choose the Action>New command or click on the New button.
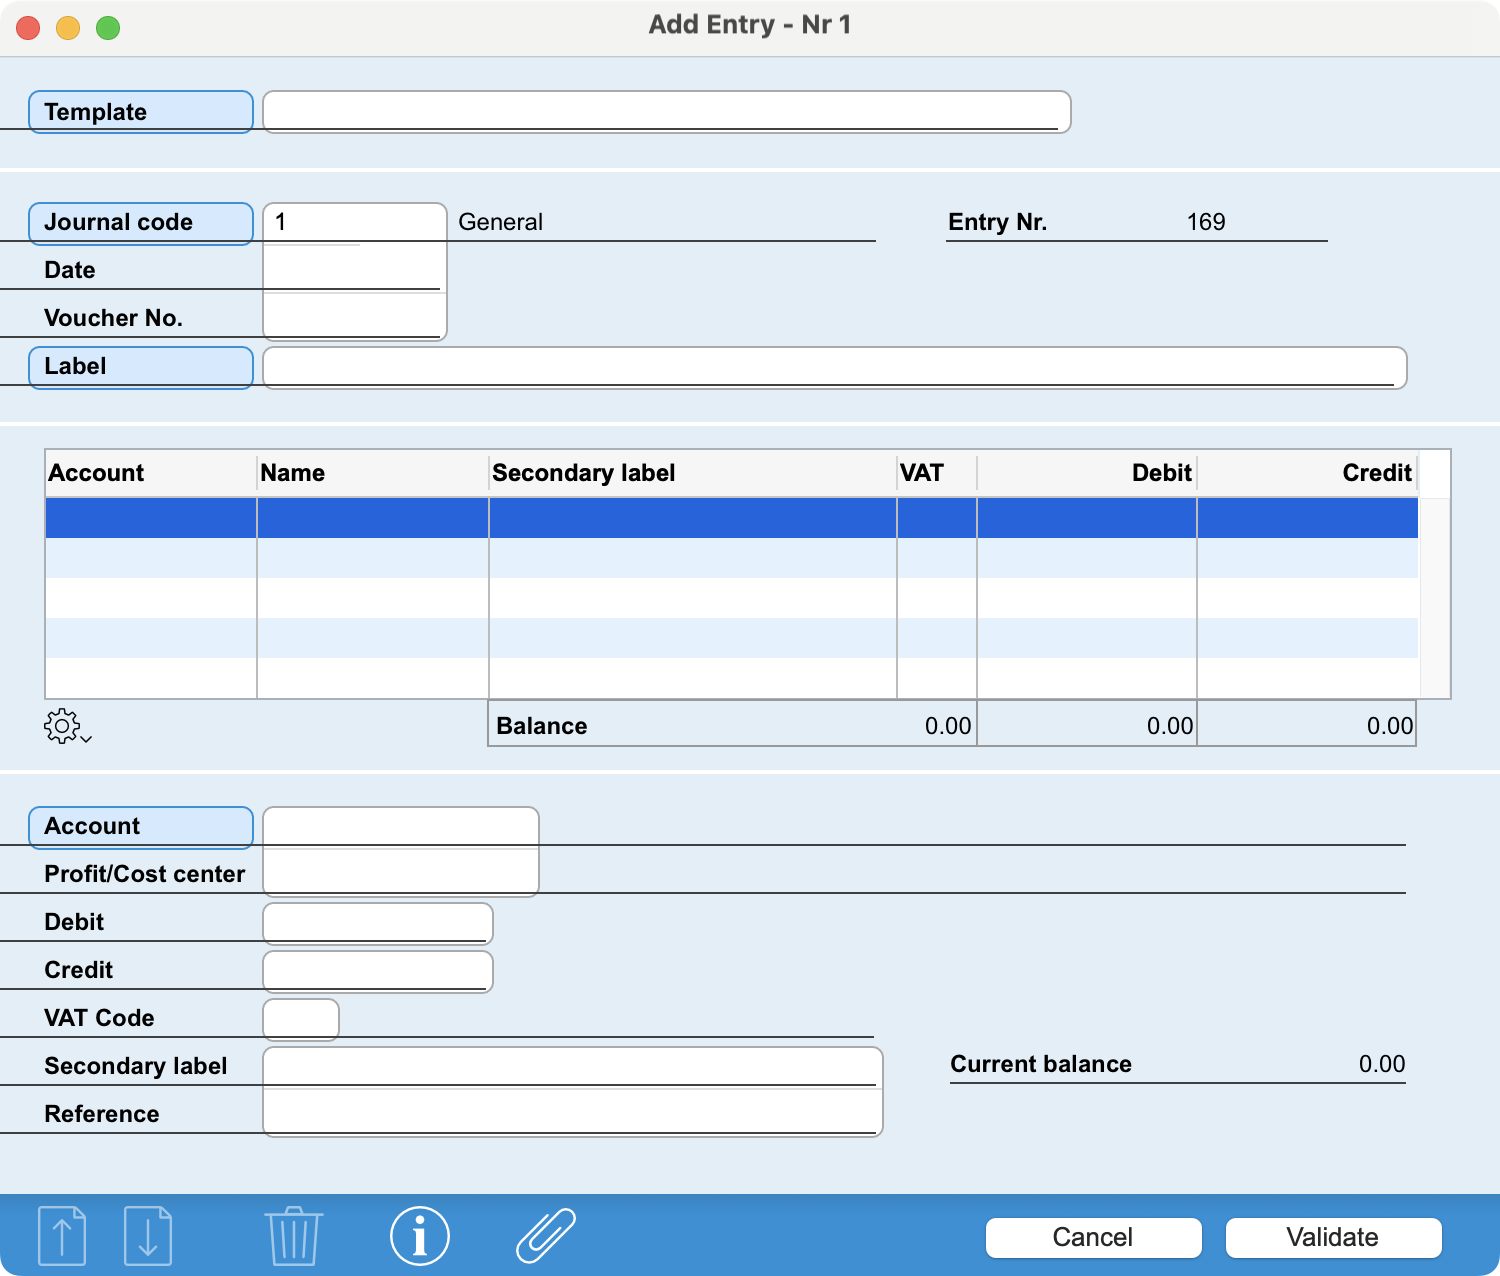
Fill in the fields. If you have previously created entry templates , you can call up the entry template by entering its code, part of its name or a keyword in the Template field.
Entries are numbered automatically. Voucher numbering can also be automatic, if required. These two parameters are set in the Action menu, via the Options command.
Journal Code 1 is proposed by default, but you can change it.
To move on to the next field, use the Tab key.
Then specify the Entry date. The default date is today's date. If you wish to change it, simply enter the day, or the day and month, and the software will complete your entry automatically.
Now enter the entry Label.
After pressing the Tab key, the insertion point is positioned in the Account no. field at the bottom of the window. The Account no. field establishes the link with the Accounts file. You can enter the data for the first line of the entry.
All entries contain at least two lines, one for the account to be debited and one for the account to be credited ; this is a simple entry . However, an entry may contain an unlimited number of lines. This is referred to as a multiple entry .
To add a new line, simply press the key combination Control N (Windows) or Command N (macOS) or the Enter key (macOS).
Entry lines are displayed progressively in the scrolling area in the middle of the entry screen. If you need to modify the content of a single entry line, simply select it; you can then edit the data in the lower part of the window.
Simple Entry
Account numbers can be partially entered. For example, by typing 6, all accounts beginning with 6 are presented on the screen in a selection window. The selection window also appears if you click on the name of the Account no. field, against a blue background.
After entering the Account No., enter the Debit or Credit amount.
To create a new entry line, simply press the ↓ key (down arrow) or use the key combination ctrl N (Windows) or Command N (macOS).
The entry is balanced if the sum of the Debit amounts equals the sum of the Credit amounts. In this case, the Balance shows zero.
Automatic Counterpart
If the expense account (e.g. 6000) always has the same offsetting account (e.g. 1011), you can further simplify entry by indicating account 1011 in the Counterpart field of the 6000 account master record. This way, as soon as you've entered the first line of the entry, the second line will automatically appear.
The Entry menu
During entry, an additional menu, the Entry menu, is displayed in the menu bar. This same menu is also offered by the button below the scroll zone.
Tips:
- When entering a series of entries, you can type the = sign in the main text to repeat the text entered in the previous entry.
- You can enter not only an amount in the Debit and Credit fields, but also a mathematical formula .
- You can change the order in which the entry lines are displayed, using the Shift ↓ and Shift ↑ key combinations.
Validating the record
The entry can only be validated if it is balanced. An entry is balanced when the balance is zero, i.e. the debit and credit totals are equal.
Validation causes VAT to be calculated automatically if the entry contains a line with a VAT Code, and if this calculation has not been requested during entry.
The program automatically suggests that you continue with the creation of a new record. To interrupt this repetitive data entry process, simply click on the Cancel button.
 Français
 Deutsch
 Italiano