The Layout editor tool palette
To the left of the editing area is a row of buttons called Tools, used to add objects to the editing area or to position objects.
To create an object in the document, click on the corresponding tool and "draw" a rectangle with the mouse, indicating the object's boundaries. The object properties dialog is automatically displayed (except for Line, Rectangle and Oval objects).
The tool palette consists of the following buttons:
| Icon | Object | Properties |
| Selection : Tool for selecting and moving an object. | ||
| Color : This tool assigns a color to the selected object. | ||
|
Text : Tool for inserting fields or fixed text. This tool creates a simple block of text, which you enter in the Text area of the Properties window. You can also insert a field from the database, by selecting the desired field from the list on the right of the Properties dialog. In the Text tab, a Format… button is displayed below the text box. Provided that at least one item has been inserted in the text area and is selected, it gives access to a dialog containing a Display Format field in which a value can be entered. This dialog is used to format the data of the previously selected field. |
Text tab : Use this field to define the text to be displayed in the format. This can be fixed text or the content of one or more fields. To insert a field, click on its name in the list of available fields. The pop-up menu above this list lets you choose fields from other files. Text attributes tab : Font, size, alignment, color, text style. Coordinate tab : Object position in the format. The Variable height checkbox defines the object's behavior: if the text contained in the object exceeds what the object can display, the object automatically expands downwards. The Rotation field allows you to rotate the object precisely (to the nearest degree). A value between 1 and 179 degrees will rotate the object counter-clockwise, while a value between 181 and 359 degrees will rotate the object clockwise. |
|
|
Special item : Tool used to insert a specific object: either text, usually taken from the database and dynamically calculated when printed, or an image, also taken from the database. The content of this element is defined by the radio button you choose on the first page of properties (either Special Text or Special Picture), then by the value selected in the list. |
Text tab : select the desired value from the list of Special texts or Special pictures Text attributes tab : Font, size, alignment, color, text style. Coordinate tab : see above |
|
| Picture : Tool for inserting an image. |
Picture tab : The image to be inserted can be pasted directly into the section or into the Object Properties window, or imported from the hard disk using the homonymous button in the Object Properties window. Choose the image to insert from the list. This list can be adapted according to the context. Coordinate tab : see above |
|
 |
Shapes : select one of the shapes to insert a rectangle, line or oval. |
Rectangle / Line / Oval tab : Define line thickness and color, background color and opacity, and other properties according to the shape you've chosen. Coordinate tab : see above
|
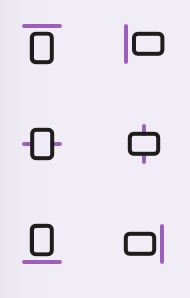 |
Alignment : Use these tools to align objects with one another. You need to select at least two objects before you can align them. | |
 |
Arrangement : These tools are used to place the selected object in the background or foreground. They are only required when several objects are superimposed. |
Text display formats
| Code | Description, examples |
| In Business | |
| §OKtext |
Prints the text that follows §OK if the field contains a value other than 0 (for numeric type fields), or if the field is not empty (for text type fields) or if the Date type field is filled in. Example: <Confirmations:Rebate/§OKAdditional rebate> Prints «Additional rebate» if the Rebate field contains a value other than 0. |
| §OKtext ^1text |
If the field contains a value other than 0, print the text following §OK, replace code ^1 (circumflex 1) with the field content and print the text following ^1. Example : <Confirmations:Delivery time/§OKDelivery time: ^1 days> Prints «Delivery time: 10 days» if the Delivery time field contains a value other than zero. |
| § |
For Boolean fields: prints "yes" or "no" depending on field status. Example: <Addresses:Blocked/§> Prints «yes» if the debtor is blocked. For the Title field in the Address record: prints the debtor's title if it's a Private, otherwise prints "Gentlemen" in the debtor's language. Example: <Addresses:Title/§> Prints «Messieurs» for a french-speaking debtor of Company type. For the same customer : Example: Veuillez agréer, <Adresses:Title/§>, nos salutations distinguées. Prints «Veuillez agréer, Messieurs, nos salutations distinguées.» |
| §lieuDateLG |
Prints place and date (month spelled out) in the language of the current debtor. Example: <Company:Town/§lieuDateLG> Prints, for instance «Lausanne, May 12th, 2025» |
| §dateLG |
Prints the date in the language of the current debtor, according to the format defined in the language configuration window (Operations menu, in Maintenance). Example: <Invoices:Date Reminder 1/§dateLG> Prints for instance «12. März 2025» (if the customer speaks german). |
| §XX...X |
Replaces the Xs with the characters contained in the field. If there are not enough Xs, the value of the field will be truncated. Example : <Invoices:BV Reference/§XX XXXXX XXXXX XXXXX XXXXX XXXXX> Prints the BVR reference number and inserts spaces every 5th character. |
| §BVR |
Amount to be paid, when printed in the box of a payment slip, which requires a certain spacing between francs and cents. Example: <Invoices:Total incl. tax/§BVR> Prints the Total incl. tax field with two spaces as decimal separator. |
| §DevToSfr |
Presents numerical values converted into Swiss francs. Example: <Orders:Total Curr incl tax/§DevToSfr> Prints the contents of the Total current incl. tax field in Swiss francs. |
| §Dev |
Presents numerical values in the format of the currency used. Example: <Orders:Total Curr incl tax/§Dev> Prints the contents of the Total current incl. tax field in the supplier currency format. |
| §* |
For text fields, insert an asterisk at the beginning and end of the value. Particularly useful in combination with Code 39 barcode font. Example: <Items-Services:Item Code/§*> Prints the contents of the Item Code field with an asterisk at the beginning and end. |
| §*format |
For numeric fields, insert an asterisk at the beginning and end of the formatted value. Example: <Items-Services:Price excl. tax/§*###’##0.00> Prints the contents of the Price excl. tax field in the «###’##0.00» format with an asterisk at the beginning and end. |
| In BiblioMaker |
|
| 1 |
A line break will be added after the field. Example: <Titles: Imprint/1> The Imprint field will be followed by a line break. Example: <Titles: Title/1T> The Title field without statement of responsibility (T) will be followed by a line break (/1). |
| 2 |
A tab will be added after the field. Example : <Titles: Authors/4§2& ; > All authors except the first one (§2) separated by a semicolon ( ;) and a line break follows the last author (/4). |
| 3 | A space will be added after the field. |
| 4 |
A line break will be added after the field, provided the field is not empty. Example: <Titles: Authors/4& - > The authors are separated by a dash (& - ) and a line break follows the last author (/4). |
| 5 | A tab will be added after the field, provided the field is not empty. |
| 6 | A space will be added after the field, provided the field is not empty. |
| §1 |
Only the first value of the field will be inserted (valid only for Authors, Secondary Entries and Subjects fields when printing catalogs). |
| §2 | All values of the field except the first one will be inserted (valid only for Authors, Secondary Entries and Subjects fields when printing catalogs). |
| §M |
For a multilingual thesaurus, the program inserts the subject in all the languages of the thesaurus, with each language separated by the = sign (valid only for the Subjects field when printing catalogs). |
| & |
Used to define the separator between the different values of a multivalued field. This sign must be followed by one or more separator characters. Example: <Titles: Subjects/&1> Only the first Subject is inserted. |
| T |
The title is inserted without the statement of responsibility (valid only for the Title field). Example: <Titles: Title/T> The Title field is inserted without the statement of responsibility. |
 Français
 Deutsch
 Italiano